salt and shiso

IMG_3859One wouldn’t think an herb so fragile and leafy as shiso (aojiso or ohba, sometimes labeled as perilla or beefsteak) would take kindly to salt, but it does.  If you grew a plant or two this year, consider making the traditional salted pickle from Japan, or a shiso kimchi from Korea.  Personally, I’m partial to the clean, simple flavor of the salted shiso, but have enjoyed both.  Either lasts for several weeks to months in the refrigerator, but quality is best after at least a few days of curing.

In Japan, red shiso (akajiso) is used as a dye for umeboshi, pickled plums, and a delicious addition to pickled cucumber or eggplant.  It’s also dried and used as a furikake, or crumbly delicious crunchy topping for morning rice.  Mmmm.

Why don’t I eat more Japanese breakfasts?

Because I don’t have a Japanese wife to make them, duh.

Ah, right.

Green shiso leaves are chiffonaded and mixed in with rice, or used to wrap bits of ground chicken breast and pork and grilled.  I often pick a few leaves and eat them with rice, using them like those little nori strips that are now popular with the nutritionist crowd.  The basil-anise-Thai basily green flavor is exquisite, and again I urge you to grow your own, as the stuff in the market is rare, expensive, and fades quickly. I’ve grown two kinds of the green shiso: one that has a purple underleaf, and one that doesn’t.

It is also preserved, most successfully with salt, but sometimes with soy and a little garlic. One can also use the seeds fresh or salted, but I scatter them in my herb bed for another crop.

The Korean form of shiso (kkaenip, sometimes called ‘sesame leaf’, Perilla frutescens var. frutescens) is a different strain of the Japanese perilla (Perilla frutescens var. crispa) and the ornamental perilla (coleus).  See a good picture in the LA Times here.  If you can find it, use it for kimchi.

IMG_2339Salted Shiso Pickle

The recipe couldn’t be easier.  Pick the largest leaves of your fresh green shiso, then sprinkle a little sea salt on each leaf, stacking leaves in a container. You might weigh them down (as I did above, with ocean beach stones) or not.  Let cure in the refrigerator for a few days, then enjoy for months.

IMG_2340IMG_2336

Shiso Kim Chi

You will need to make a souse, but this recipe doesn’t ferment the kim chi like cabbage or radishes.  It’s milder and softer, perfect for summer.

  • 3 cups medium to large shiso leaves
  • 3 tablespoons very thinly sliced red onion
  • 3 cloves fresh garlic, minced
  • 3 green onions
  • 3 tablespoons julienne carrot
  • 2 teaspoons sugar
  • 2 tablespoons fish sauce
  • 1 tablespoon powdered Korean red pepper
  • 1 teaspoon sesame seeds

Prepare the shiso leaves by rinsing them, if necessary.  Prepare the vegetables for the souse.  Thinly slice the red onion and mince the garlic; thinly slice the whites and greens of the green onion; julienne the carrot. Toss the vegetables with the sugar, fish sauce, red pepper, and sesame seeds.

Layer every two shiso leaves with a bit of the sauce, gently rubbing it into the leaves evenly.  Leave some souse for the top of the pile, press down gently, cover, and refrigerate for at least a week.

marcel duchamp, a barrel, and dutch pickles on npr

IMG_2797

I am reminded of Marcel Duchamp: a readymade.  You know the story of the most famous one, right?  To make a point about art and modern culture in 1917, he acquired an ordinary porcelain urinal, placed it business end up, signed it R. Mutt, and declared it art.  Art not just for the eyes; instead, it was meant to question the very notion of seeing art, to stimulate the senses with a much wider range of stimuli — even repugnance and a reminder of unpleasant, necessary truths.

How is a herring barrel in a history museum similar?  This one, the preserver preserved at Amsterdam’s Jewish Historical Museum, is quite handsome, actually: sturdy, rotund, golden brown, made antiseptic in its lit vitrine, but grimed and bumped and nicked as it traveled around the globe.  Who knows: did it go from the Baltic seaboard to the New World, filled with the salted herring that nourished the sailors and enriched the burghers? Did a slave from Ghana scratch a doodle into the side during a moment’s rest, or was it kicked by an angry Chinese tradesman upon a sour deal with an unscrupulous VOC rep? Or did it get rolled around the streets of the Albert Cuyp market by Jewish vendors eking out a living in fishy carts circling the city?

And how did this ordinary, workaday object become extraordinary?  Survival alone? (Hey, who could knock THAT.) Or did the herring work some artistic magic?  Did the salt slowly, batch after batch, mellow out the rough-hewn lumber planed and strapped into barrel shape?  Did the artiste (or machine?) who penned the flourishing ‘H’ of ‘Haring Ton’ feel pride in that specimen?  Did he (it) squint with a critical assessment, cough to clear some inky dust out of his (its) throat?  When we ask these types of questions, we don’t just see it as a barrel, or even just as a historical artifact.  We appreciate it for its singularity, beauty even.  And then we think gosh, it must

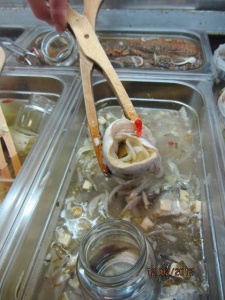
herring with pickle and onion
Herring with pickle and onion at the Vlaardingse Haringhandel stand, Albert Cuyp Market, Amsterdam

…smell.  I’ve got good news and bad news today.  The good news is that my piece for NPR’s The Salt appeared this morning on a topic very much related to this herring barrel: Dutch pickles and trade.  See it here!

The bad news is that something weird happened with my images, and the resolution is too poor to accompany the article.  I’ll figure out what went wrong, but in the meanwhile, I wanted to share some of the wonderful pickles I captured in Amsterdam at fourth generation pickler Fred Ooms’ de Leeuw Pickles and renowned Dutch-Surinamese caterer Mavis Hofwijk’s Surinaams Buffet Catering.  I’m so thrilled to have met Fred and his wife Monique, and their charming son, and Mavis and her charming daughter Candice, all thanks to artist and scholar Karin Vaneker.

IMG_3368
Amsterdam onions at de Leeuw Pickles, Amsterdam
IMG_3374
The beautiful colors that inspired Vincent van Gogh at de Leeuw Pickles
Mavis
Mavis Hofwijk macerates a genoise cake at Surinaams Buffet Catering
IMG_3541
Mavis’ mixed pickles
IMG_3565
Mavis’ marvelous brew (all the vegetables spend time in this spa to become pickles)
IMG_3331
Special spiced grape pickles for the holidays at de Leeuw Pickles
IMG_3355
Rollmops at de Leeuw Pickles — herring wrapped around a pickle? No complaints here

a year in pickles: pickle recipe index

If there’s any specialty of this blog, it’s not gardening or sustainability or Northwest politics or seasonal cooking or local cheerleading or events or complaining a lot.  It’s pickles.  We’re not quite at that magic time of the year in Oregon yet, but I see from the hits on my blog that other places in the country have hit pickling time with a vengeance.

Suffice it to say, I always have pickles on hand, and I spend the whole year pickling.

Throughout summer and late into the fall, I put up crocks and crocks of red and white sauerkraut.  Some of the sauerkraut I can and give as gifts, and other jars I leave fresh in the refrigerator, where they last for months.

Also for winter eating, I make crocks and jars of fermented and vinegar dill pickles with giant bags of perfectly sized cucumbers I buy at a local farm and my own horseradish or grape leaves, plus full heads of garlic. I make dill relish every other year.  The fermented dill pickles have delicious juice that I use all year ’round in potato salads, as a marinade for salmon, and to deglaze pan-roasted fish or shrimp.

In autumn, I restock my tomatoes, salsa, and ketchup supplies. As it gets colder, I turn the rest of the green tomatoes into pickles or salsa.  I used to use all my sweet and hot peppers to make the pepper-eggplant spread ajvar (for freezing) but my new tradition is to put up a few half-gallon jars of hot peppers to ferment and make hot sauce after many months of fermentation.

In winter, when I see the citrus fruits at their best, I make a couple of jars of salt-preserved lemons and lemon zest vinegar (to use in a pinch when I’m out of fresh lemons), and, occasionally, marmalade.  I turn a 5-lb. bag of local dried Fellenberg or Brooks prunes into pickled prunes, to eat with winter roasts. I stew some of the sauerkraut in Pinot Gris (and save the Riesling for drinking — life’s too short to waste good Riesling) and eat it with kielbasa and other smoked meats.  If I remember, I corn a brisket for St. Patty’s day in March.  I make mustard and horseradish relish from my horseradish plant’s roots.

As soon as the spring produce starts coming in, I make refrigerator pickles: salted savoy cabbage, cucumber quick pickles, chard stem pickles.  Flavored vinegar-making also begins in spring with the little purple pompom chive blossoms and tarragon, then ends with wild blackberries, Concord grapes, and cranberries in the fall.  Starting in May, I put up the requisite asparagus pickles and dilly beans; I love giving the jars of slender, perfectly straight crisp vegetable crunchies as hostess gifts for parties throughout the year.  Cauliflower pickles are a standby, as well — the purple cauliflower makes a vibrant magenta pickle.  Each time I make a vinegar brine for canning pickles, I do a double batch, then use the excess brine for refrigerator pickles made of whatever is on hand: baby turnips, carrots, beets, kohlrabi, brussels sprouts…

It’s hard to believe, but we eat them all.

Here are my pickle recipes, indexed, if you’d like to try some or all of these ideas!  All of the canned pickles are produced using tested, safe recipes that are approved by the Master Food Preserver program, with which I’m a certified volunteer. The fermentation recipes are not USDA-approved, but I have made them all many times.

fermented hot pepper sauce

Peter Piper picked a peck of pickled peppers, but Culinaria Eugenius put up a peck of fermented peppers!

Here’s how I started, with my fermented pepper recipe.  I packed a few half-gallon jars full of fresh hot peppers, garlic, and a salt brine.  It sat in a cool corner until the fermentation got going, rewarding me with the most delicious, spicy-sour peppers that would last through the winter.

They were so beautiful, and so bold.  After chopping up dozens of the peppers to use in my salsa, stirfries, beans, and anything else that would benefit from a burst of heat, I used up every last drop of sour brine from several large jars.

Happily, I realized I still had enough to make hot sauce from the hottest and fruitiest of the peppers.  I had one large jar in the back of the fridge, a blend that was heavy with burnished brown Ethiopian beriberi peppers.  They made me cough, they were so strong, but the mix of peppers had so much more depth than the plain jar of jalapenos or the mixed jars of jalapenos and other Central American peppers.

So I chopped the peppers roughly, added bit by bit to the blender with all the brine, and got this:

And thus, the best hot sauce in the world was born.  I can’t emphasize how delicious this stuff was after spicing up the salt brine from October to June.  And it’s all about the fermentation.  Fermentation is the secret of some commercial hot sauces; Tabasco, for example, ferments its pepper mash in oak barrels for up to three years.  But we don’t really take advantage of this at home, often just counting on the half-vinegar half-water hot peppers that we can from the Ball Blue Book.

There are reasons for avoiding fermentation with pepper sauce, including the problems keeping the mash at a cool temperature.  Peppers are a bit more finicky than cucumbers.  At first, I tried to strain off the delicious brine and keep that on the counter, but it developed a white film, so I knew it had to be refrigerated.

And even though the peppers in brine were fine for many months in the refrigerator, the blended hot sauce, after sitting in the refrigerator for a month or so, started to grow white mold on top, so I had to get rid of the rest of the jar.  I attribute this to the complete lack of vinegar in the brine.  You might try adding some vinegar as a preservative.  I definitely recommend making the hot sauce in small batches, since the peppers in brine last beautifully long in the refrigerator, but the peppers in the sauce seem to have a short refrigerated shelf life.

Hank Shaw’s hot sauce recipe, a wholly different preparation than mine, directs the cook to add spices, which would be great next time.  The recipe also includes two particularly good tips: using a growingly available binding agent called xanthan gum to prevent the sauce from separating, and letting the sauce settle to remove excess air.

For about 2 cups of finished hot sauce, he advises using 1/4 teaspoon of xanthan gum, mixed with 2 tablespoons cold water.  Without the xanthan gum, expect the pepper mass to float atop some briny water in your jar.  Nothing dangerous, but not the most visually appealing thing in the world.  A good stir fixes the problem.

Shaw also recommends this easy tip to battle separation:

Pour into a bowl or large jar and let this settle for 1 hour to allow all the trapped air you introduced into the sauce while blending to escape. If you skip this step your sauce will not hold together as well.

I’m going to try these steps next year for sure!  Until then, I’ll be eating this glorious sauce on barbecued pork, tacos, chicken wings, gazpacho, etc., etc., etc.

pickled mustard seeds and beet stem relish

Well, I made it to Indiana, and I’ll be here for a week or so, working on my book at the Kinsey Institute, before heading to a conference in Ohio and a visit with family.  Before I left, I made a great saag paneer dish with the rest of my collards and cilantro, which were bolting, and beet greens from the lovely beets we’ve been getting in the market.  Beets are wonderful because you can use all their parts — greens, stems, roots.

I mentioned the beet stem relish I made a few weeks ago (recipe below), but I wanted to discuss a nice bonus that comes from the pickling process: pickled mustard seeds.

Pickled mustard seeds are wonderful, and so easy.  I like to add them to any salad or salad dressing where I’d normally use sharp whole-grain mustard.  They add a delicious crunch. Because they’re preserved in vinegar, salt, and sugar, and are meant to be cold, fresh, and lively, they keep well in the refrigerator for a couple of weeks.  As they sit, they get stronger.  These are not meant for processing.  The flavor is sweet and sour.  Adjust sugar per your fancy.

Yellow mustard seeds (as opposed to the brown or black ones, which can be bitter in this preparation) are best.  They can be most cheaply purchased in bulk at a health food store or Indian market.

The brilliant salmon color of the ones above are due, of course, to the dark red beet stems. You could slip a sliced beet in your pickle to mimic the color if you like.

I’m including two recipes, one for the beet stem relish and one for plain pickled mustard seeds.  Enjoy!

Pickled Beet Stem Relish

Yield: 2 pints.

  • 3 cups finely chopped young beet stems
  • 1/2 cup finely chopped carrot
  • 2 tablespoons finely chopped spring onion or red onion
  • 1 cup white wine vinegar
  • 1 cup water
  • 1/2 cup sugar
  • 2 tablespoons pickling salt
  • 1/2 tsp coriander seed
  • 1/2 tsp fennel or dill seed
  • 1/2 tsp black peppercorns
  • 2 tablespoons yellow mustard seed

Trim the leaves off the beet stems.  Rub the stems under running water to remove all traces of mud.  Finely chop the stems — this is important, as they will be tough and stringy in larger pieces or batons.  Chop the onions and carrots in similar pieces.

Wash and sterilize two pint jars (I pour boiling water into the newly washed jars, or you can take jars immediately out of the dishwasher.)  Combine vinegar, water, sugar, salt and spices in a small saucepan and bring to a boil, stirring to dissolve sugar and salt.

Scoop out spices from the brine and add to warm jars.  Add raw vegetables to jars, pressing down gently so they are packed generously but not too tightly.  Pour boiling brine in jars up to about an inch from the top.  Cover with plastic lids or metal lids protected by a layer of plastic wrap (so the lids won’t corrode).  Let sit on counter until cool, then refrigerate for at least a few hours before eating.  Pickles will keep with excellent quality for about a week.

Pickled Mustard Seeds

Yield: 1/2 pint.

  • 1 cup white wine vinegar, or any homemade vinegar (no need to worry about acid levels here, since it’s a refrigerator pickle, not a processed one). Consider berry or cider vinegar
  • 1 cup water
  • 1/4 cup sugar
  • 2 tablespoons pickling salt
  • 2/3 cup yellow mustard seed
  • one slice of raw red beet for color (optional)

Wash and sterilize one pint jar (I pour boiling water into the newly washed jars, or you can take jars immediately out of the dishwasher.)  Combine all ingredients in a small saucepan and simmer for 30 minutes, stirring to dissolve sugar and salt.  Remove beet slice.  Let cool and store overnight in refrigerator.  Keeps in refrigerator for weeks.

Quick Beet Raita

Raita is a cooling Indian condiment made from yogurt and spices and the occasional vegetable like cucumbers, carrots, or, as I discovered, beets!  I used about a 1/4 cup of beet stem pickle for 2 cups of plain, full fat Greek yogurt, then folded in a few shakes of cumin, coriander, and white pepper.  Salt to taste, then add a 1/2 cup of sliced or chopped roasted beets and a handful of chopped cilantro.

smokin’ hot peach chutney

We’re nearing the end of peach season in this long, late summer in the Willamette Valley.  If you find yourself with a glut…nah, heck, if you have even a small amount of peaches or are tempted to go out and buy peaches, save some for this chutney.

Sweet and spicy with brown sugar, cider vinegar, a ton of fresh ginger, and mustard seeds, I punched it up even more with a new local product, my friend Polly Wilson’s Hell Dust.

Hell Dust is a dried spice blend made from Polly’s own hot peppers, smoked over a wood fire and ground down into flakes.  Couldn’t be simpler.  What I discovered was that it provides a smoky flavor to anything that it touches, and the heat stays hot in canned products, unlike other hot pepper flakes that dissipate.  Yes, it’s HOT.  It’s similar to dried chipotles, but she uses a blend of green chiles (and red?) that have a richer diversity of flavor.

(Disclosure: Polly gave me some Hell Dust to sample when it was being developed as part of her taste trials, but I wouldn’t gush about it if I didn’t think it was fantastic and unusual.  You can buy it on the website linked above, or at Hentze’s Farm, Benedetti’s, Sundance, and Long’s Meat Market.)

The chutney is easy to make: you chop up the ingredients and cook them down for an hour or so until rich, caramel brown.  It can be canned or frozen.  Save some for right now; I couldn’t wait.  Fabulous with any roasted meats, spinach or garbanzo bean curry, cheese sandwiches, plain white rice, pilafs.  I even used it as a salad dressing last week.  I think I’m in love.

This recipe is based on Linda Ziedrich‘s recipe in Joy of Pickling and the less gingery recipe in So Easy to Preserve.

Smokin’ Hot Peach Chutney

Makes 7-8 half-pints.

  • 1 medium white onion, cut coarsely into pieces
  • 1 clove garlic, chopped coarsely
  • 1 1/2 cups golden raisins
  • 4 lbs. very ripe peaches, peeled (use a freestone variety like Suncrest for ease of pitting)
  • 1 tablespoon Hell Dust or same amount of minced chipotle peppers or red pepper flakes (see note above)
  • 2 tablespoons yellow mustard seed
  • 1 cup fresh ginger, minced
  • 1 tablespoon pickling salt
  • 2 cups cider vinegar (be sure it is 5% acidity for canning)
  • 3 1/2 cups brown sugar

Pulse onion and garlic pieces and raisins in food processor until finely chopped.

Peel peaches by submerging them whole in boiling water for 30 seconds, then plunge in cold water. Skins should slip off.  Eat the skins!  Pit peaches and coarsely chop them.  Add them to large pot for the chutney with the onion mix and rest of the ingredients, and mix well.

Simmer mixture 45 minutes to an hour until deep brown and thick.

Wash your jars, rings, and lids, and heat the lids according to the package instructions.  Spoon the hot chutney into jars, leaving 1/2-inch head space.  Remove air bubbles from jars by tamping gently on the table.  Wipe rims of jars carefully and adjust lids and rings.  Process in a waterbath canner for 10 minutes, then store in a cool, dark place.

Peachy!

harvest time and the livin’ is easy

We’ve entered the time of year we dream about for the other 11 months, that juicy, sweet, lazy crest of summer in Oregon. It takes effort to do anything we’re all so full of endorphins, so happily disengaged.  The land of the lotus eaters ain’t got nothing on us.

But if you (meaning me) can pull yourself away from that glass of Pimm’s cup and grilled lamb, prepare for the cloudy days ahead with canning.  Aw heck, just buy and eat it all fresh.

Raspberries.  Get ’em while you can, preferably today or tomorrow.  We’re in the last throes.  Riverbrook Farm on E. Beacon Drive off River Road is out and closed for the season.

Boysenberries, ditto.

Marionberries, ditto times two.  Our main season blackberries are starting to come in and that signals the end for the specialty crosses.

I did find a U-pick for blackcap raspberries (!!) on Beacon down the street from Riverbrook.  Go. Immediately.  They were closed on Sunday but they might have a day or so left, I’m not sure.  Never seen a blackcap?  Look at the picture or read more here about Huerta de la Familia’s pioneering project.  That’s my plant above, but they’re small compared to what you can get from Huerto or the farm I found today.

Blueberries — great crop this year.  Buy in volume and eat with abandon.  U-pick all over the place, too.

Pickling cucumbers are in full force at farms, for those of you who pickle.  Buy them in 10- and 25-lb. bags in small, medium, large, and XL (I go for medium, since they’re easiest to wedge in jars).  Those of  you who pickle surely know this already!  Do buy a big armful of dill and freeze the heads now for use all year.  Frozen dill heads are superior to fresh ones in pickling.  Make with the clicky for my recipes and tips.

Beans are good to go for pickling, too, and looking great.

The first ‘Bodacious’ corn has appeared.  This is a local celebrity, but I think it might not be my favorite (tho’ I’ve never said no to an ear of corn, so I’ll thankfully eat it and any other corn I can get).

Beautiful cabbages, heavy with juice, are also widely available.  Now’s the time to make bright fuchsia sauerkraut before the summer dries out the less hearty red heads.  They (who? I dunno, just “they”) say, however, that green cabbage needs a frost to make the best kraut. You decide. I, for one, can’t wait.  The small heads will weigh about 5 lbs. right now (about twice as heavy as a supermarket cabbage of the same size), so don’t buy too much!

Albacore season has started.  I helped out at a Master Food Preserver canning class (which are all full, by the way, sorry).  Get on next year’s class list (!) by following the information in local food writer (and MFP!) Jennifer Snelling’s recent article in the Register-Guard or try your own by following my instructions, which are an annotated version of the Extension-researched and approved recipe she posted in the article.

Peaches have just started.  Non-local apricots are still on the shelves.  They’re generally from E. Washington, not California, which is good news.  First plums, too.

Good prices on Hermiston watermelon and cantaloupe.

And for that fresh blackberry pie?  Pick up some flour for your dough at Camas Country Mill at the Saturday Lane County farmers market downtown or Springfield farmers market on Friday.  Really a brilliant interview with Tom and Sue Hunton of Camas on “Food for Thought” today, perhaps their best yet.  Listen to the archive if you want to hear a firsthand account of how life in the south valley is changing for grass seed farmers — or at least how it can change in a very positive and sustainable direction with some capital and vision.  I’m so proud of these folks it almost hurts.  Oh, and by the way, here’s my adaptation of Camas Country Mill teff cookies, mentioned in the broadcast. :)

What else is in season?  What are you loving?

fermentation nation: radish kim chi

For the upcoming fermented foods class, hosted by your very own Lane County Master Food Preserver Alliance on April 13, 6-8:30, I’ll be demo-ing radish kimchi, among other things. Isn’t it beautiful?

My favorite type of kimchi, when it’s good, is the radish cube kimchi left to ferment on the counter for a few days.  The Koreans call it “kkak ttu gi” or “ggak du gi,” and when it is properly juicy and bubbly, it will have almost a fizzy, live quality when you bite into a cube.

All that fermentation provides kim chi with all the health benefits of sauerkraut; the stuff is teeming with probiotics, vitamins A, B and C, iron and calcium.

But that’s not why we eat it.  We eat it because it’s delicious.

In Eugene, there aren’t many Korean restaurants that serve cubed radish kimchi, but they’re pretty standard in the ban chan collection of kimchi and pickles you see in big city Korean restaurants.  (They do sell radish kimchi at Sunrise Market, fyi.)  But it’s much better when you can make it at home.

All you need is a gallon or larger glass jar (the red pepper will stain plastic) and a trip to the local Korean market, where you will buy Korean red pepper (much milder than our ubiquitous chili flakes), a Korean radish (a.k.a. “moo”), tiny salted shrimp, garlic, ginger, and green onions.  I used garlic chives from the farmer’s market, too.  The Korean radishes vary in size, but most approximate an elongated cantaloupe, or a small football.

If you can’t make it to the class — where I’ll be providing my recipe and tips and samples — and you’d like a step-by-step illustrated recipe, this is a good, simple one.

Radish Cube Kim Chi

  • 1 large Korean radish (“moo”) or enough daikon for 6-8 cups cubes
  • 2 tablespoons salt
  • 1/3 cup minced garlic (or throw into food processor with ginger)
  • 1-2 tablespoons minced ginger
  • 1/2 cup fine (vs. coarse) Korean red pepper powder (“gochu karu”)
  • 1 tablespoon sugar
  • 1/4 cup Korean salted shrimp, minced
  • 1 tablespoon sesame seeds
  • 1 bunch scallions, cut into 1-inch pieces

Peel and cube the radish into 1-inch (no larger) pieces.  Salt and let sit in bowl on counter for 1-2 hours.  Drain the cubes and rinse in cold water.

Prepare the kimchi souse.  You can either make a paste in a food processor with the garlic, ginger, sugar and shrimp, or just finely mince everything and combine with the drained radish cubes.  Mix well with your hands (you might want to use gloves if your hands are sensitive to spice), massaging spices into the cubes.  Add a little bit of water to ensure everything is nice and pasty, and the souse covers the cubes.  Add the sesame seeds and scallions and mix well.

Place the kim chi in a gallon or larger-sized glass jar that has been thoroughly cleaned and sterilized.  I use a 3L hinged jar without the rubber ring, so I can close the jar but not seal it.  It helps to use a canning funnel to get the cubes into the jar — you’ll get red pepper paste everywhere.

Let sit on the counter for about 2 days, mixing and pushing down the radish cubes into the souse.  After it starts to bubble, let rest in the refrigerator for 5 days before eating.  If you can wait that long.  The fermented kim chi is the best, in my opinion, but you can actually eat the stuff at any point from right after you make it onward.  It will keep in the refrigerator for a few months, but the flavor will change over time.  Keep tasting, and eat it when it tastes best to you.  (The photo above is after a day of sitting on the counter, and the first two shots are immediately after being made.)


pickled cheese? czech.

I finally found a preparation for those anemic supermarket Camemberts, thanks to Czech bar food, which takes no prisoners. Nakládaný Hermelin is a garlicky Czech specialty I wish I had found in Prague last summer, but saw it on the internet instead.  Hermelin is a bloomy rind cheese similar to brie, and it is pickled in big ol’ jars of spiced oil made heady by garlic, peppers, and onion.

Of course, if you wanted to use an imported Camembert, my assistant and I wouldn’t say no.  Nakládaný Hermelin hails from the same class of bar snacks as utopenci (“Drowned Men”): fine-grained miniature sausages, pickled in vinegar.  See?  Take no prisoners.

Preparing Nakládaný Hermelin is quite easy: just take a wheel of Camembert, slice it in half horizontally through the middle, press slivers of garlic and dust each half liberally with top quality paprika and pepper, then put the two halves back together.  Slice in wedges so it will fit in your sterilized jar, then layer with onions, bay leaf, and pickled peppers, and cover in oil.

I’ve adapted the recipe adapted from a blog called Northern Table and variations on this Czech food message board.  I’d warn against any of the versions that suggest leaving the cheese on the counter to ripen at room temperature for several days or longer, however, or reusing the oil.  You can get pretty sick by eating soft cheese left on the counter under any circumstances, and Camembert doesn’t quite have the acid one needs to stave off botulism in anaerobic (i.e., under oil) environments.

What you’re losing is the ripening and oozifying of the cheese.  By using pickled peppers you’d be lowering the pH even more, so, um, maybe…but I really don’t trust those garlic slivers in the center of the cheese.  It’s just not worth the risk.  And it’s still pretty darn good, all garlicky and spicy, after being refrigerated for a week.

I wouldn’t waste your best, raw milk Camembert on this preparation either.  Use pasteurized cheese, both for safety and budget.  The garlic and oil will kill any subtle nuances of a good cheese, believe me.

Rawr!!

Before serving, I’d suggest taking out the wedges you’d like to eat and letting them sit at room temperature for a while (and I’ll let you decide how many hours is “a while,” with the food safety proviso that 2 hours max is the limit for prepared foods).

As for the size of the jar, well, that’s up to you.  A quart canning jar for two small rounds of cheese seems ideal to me.  I managed to squeeze a small wheel into a pint jar, just barely, for my first try, and had a hard time getting the oil to fill all the air pockets (also important for food safety reasons).

Be sure you sterilize the jar by washing it well, then letting it go through the heat cycle of your dishwasher or boiling the jar for 10 minutes.

Dobrou chut!

Nakládaný Camembert

This recipe is easy to scale up or down, and Czechs experiment with the spices to their own taste, so you can’t go wrong.  The proportions here are estimated, since I made mine in a pint jar.  I’d advise using more paprika than less, and less garlic than more.  I’m not sure that I’m happy with using vegetable oil, since it didn’t add anything to the flavor of the cheese, but that’s what they use.  You might experiment with olive oils.  Other suggested spices are mustard seed, whole coriander, fresh rosemary (make sure it is completely dry), or dried hot peppers.  You could also just add 2 tablespoons of pickling spices for a slightly different taste.

  • 1 jar, quart-sized
  • 2 small rounds of pasteurized Camembert (about 8-10 oz. each), not too ripe
  • 2-4 cloves garlic, slivered as thinly as you can
  • 1 medium onion, sliced thinly in rounds
  • 2 cups pickled peppers (try a mix of pickled jalapeño rings and pickled roasted red pepper strips if you don’t have your own canned)
  • 2 tablespoons good quality sweet paprika (smoked would also be good)
  • 2 teaspoons juniper berries
  • 2 teaspoons whole allspice
  • black pepper
  • 3-4 fresh bay leaves (if you wash them, be sure to dry them completely, since moisture in anaerobic preparations encourages clostridium botulinum growth)
  • 1-2 cups vegetable or a light olive oil (you’ll need enough to cover the cheese completely)

Prepare a clean, sterilized quart jar (see notes above) and a lid/ring combo or a plastic cap.  Refrigerate the cheese so it is as stiff as possible.

Slice the onion thinly into rings, and slice the garlic thinly, then cut it into slivers.  Thoroughly dry your bay leaves.  If you have a mortar and pestle, crack the whole spices to release the oils.

Prepare the chilled Camembert by slicing each wheel in half lengthwise, so you expose the inside of the wheel. Work fast and with a confident hand, because it is sticky and may fall apart if you mess around with the cut too much.  Press the garlic into one of the exposed halves for each cheese.  Sprinkle both halves of the interior with the paprika and lots of fresh black pepper.

Rejoin the two halves of the cheeses, then slice into wedges that will fit neatly into the jar in layers.

Layer the ingredients in the jar.  Place several onion rings and some spices at the bottom of the jar.  Use onions, pickled peppers, and bay leaves (and dried chiles if using) to separate the wedges, filling the gaps with more pickled peppers. Press the cheese down so it is firmly packed, but don’t pack too tightly.

When you are about half full, add some oil and more spices.  Press lightly with a spoon to release air bubbles.

Keep adding cheese and other items until the jar is about 3/4 full, then top off with oil, again pressing down and checking for air bubbles.  Add the rest of the spices.  Make sure the cheese is fully submerged in the oil.  Close with a canning lid/ring or plastic cap.

Refrigerate for 1-2 weeks, checking after the first few days that the cheese is still submerged.  When you’re ready, enjoy thin slices with traditional rye bread or a baguette, and some Czech lager.  The cheese should taste very garlicky and cheesy — if any off flavors or odd colors or mold are present, don’t eat.

senfgurken: vengeance will be mine!

Senfgurken, mustardy pickled cucumbers popular in Germany, are warriors in the battle of the summer squash.  Vengeance will be mine!

We all know the war — summer squash vs. you.  One day, you’re harvesting tiny cucumbers and zucchini, some even with their blossoms still on the fruit.  You look carefully every day or so, removing the young, tender squash from their vines.

But lurking under the trap doors, hidden down in the tangle of vines just out of reach, is a terrible creature biding its time until it can swell up and take over the garden: a monster zucchini or a yellowing, bloated, misshapen cucumber.

Overgrown zucchini can be used for quick bread, of course, but I’ve always felt slightly ashamed of the bloated cucumbers.  After all, what could I do with them?  Discarded, they are sending the wrong message to the rest of the plants, that one can escape the gardener’s scythe if one just hides long enough.  And then, if composted juuuuuuuust right (i.e., not correctly) your seeds will germinate and you will live again, muwahahahahahahh!

This vegetable revolt went unchecked in my garden until I discovered senfgurken, which magically transforms the yellowing cukes into mustard-spicy sweet pickles similar to watermelon rind pickles.  Indeed, they are less work than watermelon rind pickles, too, and you don’t have to collect a bunch of sticky, hard-to-peel rinds.

This year, I grew quite a few cornichons, which immediately slipped beyond my control.  Cornichons, tiny french cucumbers, do not fare well when let go:

Senfgurken time.

Use very yellow, very bloated, horrible-tasting, late summer cucumbers for this recipe.  My cornichons didn’t yellow beyond this point, but the pickling cucumbers did.  Any yellow-bellied cur of a slicing cucumber will be a marvelous martyr on the battlefield.

Oh, and the seeds?  Save them for planting next year, so the war can continue.  And then you won’t have to fund it with money for schools or public programs!

Senfgurken Mustard Pickles

(Adapted from several recipes, including Linda Ziedrich’s Joy of Pickling)

Makes 8-9 half-pints or 4 pints

  • 5 lbs. large yellowed (overripe) cucumbers
  • 1/4 cup pickling salt
  • 3 cups cider or white wine vinegar
  • 1 1/2 cups sugar
  • 2 tablespoons pickling spices, separated into two equal piles
  • 2 tablespoons white mustard seeds, separated into two equal piles

Peel cucumbers, halve, and scoop out the seeds (save for next year’s planting). Cut into strips about an inch wide, and cut the largest pieces in half.  Salt slices, and soak overnight on the counter (or for 8-12 hours) until the cucumbers are pliable.

Drain the cucumber slices, but do not rinse.  Bring your water bath canner up to a boil and prepare your jars, lids and rings.  Since you will be boiling them for 10 minutes, you do not need to sterilize the jars, but do wash well.

Combine the vinegar, sugar, and half of the mustard and pickling spices in a medium-sized pot, and bring to a boil.

Reduce the heat, then add about half of the cucumbers to the brine.  Let simmer for one minute.  Then remove the slices with a slotted spoon and place in the jars with the aid of a wide-mouthed canning funnel.  Once all the cucumbers are in the jars, fill to 1/2 inch from the top with the hot brine, including as many of the spices as you can.  Remove air bubbles in each jar with a plastic knife or chopstick, packing the slices down well, and rearrange any slices floating with their tails pointed upward and well out of the brine.  Wipe jar mouths and adjust lids and rings.

Add the remaining spices to the leftover brine, then bring to a boil again and repeat procedure with the rest of the cucumbers.

Process in boiling water bath for 10 minutes.  (Linda Ziedrich suggests low-temperature pasteurization for 30 minutes at 180 to 185 degrees as an alternative to boiling.)

Once cool, check the seal on the jars and refrigerate any that did not seal.  Remove the rings and keep jars in a cool, dark place for 3 weeks before eating your pickles.

Serve with ham or other cured meats, pork roast, sausage, or cheddar cheese.