sourdough starter experiments with bonus pancake recipe

IMG_7064IMG_7067This is the book of the generations of sourdough starter. Well, blog post, anyway.

As described earlier, our Bread 101 class is making sourdough as a lab project. If you’re interested in participating or following along, we are making baker Chad Robertson’s rather complex and detailed starter recipe from his book Tartine Book No. 3.  My fellow instructors Elly and Karen are blogging their experiences, too, so check out Elly’s detailed daily blog entries and recipes at We’re Out of Eggs, I’ll Use Asparagus and Karen’s blog musings on fermentation and local cooking at Fairmount Neighborhood Farmers Market.

The upper right image is my initial starter made with 50/50 Open Oak Farm ‘Maris Widgeon’ wheat and King Arthur unbleached white flour.  Maris Widgeon is a bread flour that is grown in the Willamette Valley by the Open Oak/Adaptive Seeds family, but was developed 50 years ago for roof thatching in Europe.

The starter is almost unhappily tart with lactobacilli, the same beasties that create the sour in sauerkraut and yogurt.  With the almost constant fermentation I do, my kitchen is full of them.  The image on the upper left is the result of feeding a piece of the initial starter with more flour and water and letting it sit for another day to beget starter 2.0.  24 hours later, nearly godlike, I took a piece of starter 2.0 and fed it with more flour and water to beget starter 3.0.  The bottom image is starter 3.0, forming nice bubbles and smelling much more yeasty and pleasant rather than lactic.

All of us on the teaching team had the same reticence about the waste that goes into creating this sourdough starter.  The general idea is to ferment a couple cups of a flour-water paste, then pour off a small amount (75 grams, if you must know) then feed that little piece (250 grams of water and flour, if you must know) for 24 hours, then start again, repeating for several days.  Some of us reduced the initial inputs.  Others (like me!) made sourdough pancakes with the leftover fermented batter.  And they weren’t bad!

Be sure to check out Elly’s recipe and process for sourdough pancakes, which differs from mine.  For more on the fermentation process, see Karen’s entry on her starter.

EDITED TO ADD:  After a week or so of feeding, the starter has calmed down and is smelling more yeasty now, nice and gently sour, more bready than sauerkrauty.  Collateral damage, though, perhaps:  did the yeasts affect my latest batch of crème fraîche, souring next to the sourdough?  It failed to set up and grew mold on top almost immediately.  It’s always a wild ride with fermentation!

Sourdough Pancakes

Serves 4 with bacon.

  • 2 cups fresh sourdough starter
  • 1 egg
  • 3 tablespoons maple syrup
  • 2 tablespoons vegetable oil
  • 1 teaspoon baking soda
  • 3 tablespoons milk AND/OR 3 tablespoons cornmeal or flour
  • 1 tablespoon butter or coconut oil

Combine starter, egg, syrup, oil, and baking soda.  Use some milk to thin the batter to a pancake batter consistency OR add some cornmeal or flour if the batter seems too thin. You will need to use your judgment and your own pancake tastes – some like them thicker and fluffier than others. I ended up using both milk and cornmeal to find a perfect balance between batches.

Let the batter sit on the counter for 10-15 minutes to allow baking soda to do its magic.  Heat nonstick skillet or griddle to medium heat.  Add butter or coconut oil, coating pan as it melts, then pour 3-4-inch diameter rounds of batter for each pancake.

Prepare in batches, cooking pancakes until the surface is well bubbled and mostly dry on top, then flip over and cook for a few minutes more. You are looking for golden brown surfaces on both sides. The pan is too hot if it burns unevenly, and too cool if the pancake just soaks up the butter and doesn’t brown.

Serve with maple syrup. You may freeze leftover cooked pancakes on a cookie sheet, IQF (individually-quick-frozen) style, then pop them off the sheet and store in freezer bags for a quick breakfast.


fermented salsa party

IMG_4080IMG_4077Salsa is one of the preservationist’s most difficult challenges.  In terms of flavor, at least.  Canned salsa always tastes cooked and too lemony to me.  And there’s this odd insistence in adding cumin and garlic, two flavors that I just don’t like in salsa.  Or oregano, of all things.  Perhaps I’m being too fussy.  But I really want something like pico de gallo but all year round and without compromises.  Is that too much to ask?  Well, I suppose so.

I couldn’t find a trustworthy and delicious salsa recipe online, so I had to make one.  And to you, dear reader, I present it as my latest gift.  It’s superior to canned salsa in all ways but one: you need space in your refrigerator to hold two half-gallon jars.  I realize that’s sometimes difficult.  But if you can’t swing that, do try a half recipe.  This one really should be part of your repertoire.

If you want to add garlic, you can, but just a few cloves.

The flavor of the salsa changes over the course of months in your refrigerator, becoming more and more sour.  It will still taste lively and fresh, regardless.  I find the extra sour flavor really refreshing on winter tacos and quesadillas, or stirred into beans.

Lacto-fermented Salsa

Yield: 1 gallon + another small jar for eating now.

  • 2 pounds white onions
  • 1 cup mixed fresh red frying peppers, green bell or long peppers, and/or hot peppers
  • 1 cup packed cilantro leaves
  • 6 pounds Roma or other paste tomatoes
  • 1 cup fresh lime juice
  • For each cup of finished salsa: 1 tablespoon whey drained from live-culture yogurt or another fermented juice (I used tomato kvass and green bean ferment juice, but I doubt you’ll have that!) and 1 teaspoon kosher salt (approximately 2 cups of whey and about 3/4 cups of salt).

Wash two half-gallon jars or four quart jars.  Pour boiling water in jars to top and let sit in sink while you are prepping vegetables.

Clean, trim, and quarter tomatoes.

Coarsely chop onion, peppers, garlic, and cilantro to ease their way into the food processor.  Working in small batches, pulse all vegetables except the tomatoes three to five times, and set aside in bowl large enough to mix 1 gallon salsa.  If there are any large pieces remaining, hand chop so everything is roughly even.

Pulse the tomatoes in batches in a similar fashion.  Do not blend so much they become paste-like.  There should be pieces of tomato left.  Hand chop any large pieces remaining.

Mix the vegetables together in the bowl with the lime juice.  Set aside whey or other fermented juice and salt.

Ladle the salsa into jars using a liquid measuring cup and a wide-mouth funnel.  For every cup of salsa poured into the jar, add one tablespoon whey/other fermented juice and one teaspoon sea salt.  Important:  leave about 3 inches of head space to account for bubbling.  Do not (trust me) overfill the jars.  Any salsa left over can be enjoyed fresh.  Last time I had about a pint.

Mix well, screw on lids, and place each jar on a plate or tray for any leaks.  Leave at room temperature for 1-4 days until bubbly and fizzy and sour.

There will be separation issues (see above picture).  Stir every day to push down vegetables and more evenly ferment. I find it impossible to keep the salsa pieces submerged under liquid and the salsa has a tendency to pack itself up near the top, so I am more vigilant about stirring and examining for mold.  It’s a quick, already acidic ferment, so I have been 100% successful so far in fermenting, but I do want to issue a caution that this part should be monitored.  I also wipe down the rim of the jar to discourage mold growth each time I stir.

When is it done?  Taste it.  It should be sour and lively.  I find it is best around 3 days, and the longer you let it ferment and get sour and fizzy, the longer it will keep in the refrigerator.  Mine lasts for many months.

Once it tastes good to you, refrigerate.

fermented sichuan green beans or long beans

IMG_4042 IMG_5314Even the most stalwart food tinkerer can fixate on a single dish; indeed, it’s our calling card to cooking.  For me, it was fermented green beans.  I couldn’t resist the soured, greenbeany niblets of long beans in a Sichuan dish I had in Cambridge’s Kendall Square (the now sadly defunct Thailand Café) last spring.  Long beans are what string beans fantasize of being.  Sometimes called yard-long beans, they are good in Thai and Chinese stirfries.  I often use them in curries.

So sour grapes, er, rather, sour fermented beans were definitely a goal.  Minced pork with sour beans is a well known Sichuan dish, so as soon as I returned home, I made quicklike for my Fuchsia Dunlop library and immediately put up a quart of the beans in the manner she suggested: full of warm spices and punchiness like rice wine, ginger, star anise, Sichuan peppercorns, etc.

Complete failure.

The alcohol inhibited the fermentation, so it turned olive grey and salty, but never achieved the sourness I was seeking. The ginger tasted weird.  The other spices were a distraction, but I wasn’t sure if they were the problem.

So I tried again without alcohol and ginger.  Still bad.

So I tried yet again, but this time sticking with the pure flavors of beans and salt.  Much better, but I had been keeping the beans whole, which created an odd, rubbery texture.  I had thought that it would help them stay intact and not quite so salty, but the tradeoff was not worth it.  And since Germans slice and pound beans in the fermentation process for sour string beans (and when have the Germans done anything wrong?), I thought I’d give it a try.

In the final batch, I chopped the beans into small pieces.  I added quite a bit of garlic, and there they were: delicious, sour, flavorful beans.  They were indeed a bit salty, so rinsing or soaking them before stirfrying them and declining any more salt or soy sauce in the dish is a good idea. The longer they sit in the refrigerator, the saltier they will get.  I ended up quickpickling more beans in the remaining brine, and they were good, too.

The soured beans were stirfried with some fresh green beans, ripe red pepper, and a beautiful variety of burgundy leafy greens sourced from Good Food Easy and Adaptive Seeds along with the minced pork.  No other seasonings needed except for a cube of frozen chicken stock for sauciness. Delicious.

Fermented Green Beans

  • Enough beans to fill a quart jar half to 2/3 full when chopped into small pieces
  • 5-6 garlic cloves, lightly smashed
  • 2 tablespoons sea salt
  • 1 tablespoon of whey, sauerkraut juice, kimchi juice, or any other similiar live ferment to help along the process (optional)

Chop beans and peel and smash garlic.  Add to jar.  Mix up a brine with one quart of hot water and sea salt, stirring to dissolve salt.  Pour brine over beans, add optional fermented juice, weigh down beans with a weight or similar so they are submerged in brine, and let sit on the counter for 5-7 days.  Taste for sourness.  When they are sour enough for you (I probably went for 9-10 days, in all honesty), refrigerate and let cure for a week before enjoying.  Rinse or soak beans to remove some of the salt before using in a stirfry.

need probiotics? like kombucha? try easier, tastier blackberry kvass

IMG_5417Yes, I’m a little obsessed with a fermented fruit beverage called kvass. I’ll admit it.  I just put up another gallon, this time with odds and ends I found in my freezer and crisper bin.  In my case, that’s tayberries, gooseberries, Gravensteins, and rose geranium. Surely the nectar of the gods.

I make no apologies for despising the nutritionist, food-measured-in-dietary-units national neurosis approach to dining, but since I’m clearly in the minority here and actually got some health benefit from my new hobby of making kvass, I’ll stagger on to the bandwagon and flop down, flabby and winded and horrifying, next to your favorite athlete for a moment.

Ladies and gentlemen, may I have your attention pleeeeease!

Last week I was feeling pretty punky and went through a course of strong antibiotics, a maneuver that would have guaranteed me a yeast infection in the days of yore.  Take acidophilous pills, cried the medical establishment.  Instead, I went red: a Russian drink so delicious, so sour and refreshing, that the Avenging Angels of the Grumpy sing, I only had a bit of nausea and marched back to health.

With this. Blackberry kvass. Behold.

IMG_5317IMG_3922IMG_5324IMG_5316If you can get your hands on wild blackberries and your neighbor has an apple tree, this drink will be even better, because it will be just about free.  Compare that to a paltry, precious glass bottle of fancy kombucha at Market of Choice!

The recipe is simple. Chop apples, add berries and everything else, add water and let bubble on counter for 2-3 days, or until sour and bubbly.  The last photo is the fruit strained from the jar after a couple of weeks.  It can be used for a second batch, which will be a bit weaker in flavor but still palatable.

You don’t need to add honey or a kickstarter for the fermentation like whey or a little leftover kvass from an earlier batch, but I think it really helps with the quality of the ferment.  I don’t do the double fermentation method, but if you want a fizzier, slightly more alcoholic drink (for kvass does contain very low amounts of alcohol thanks to the fermentation), place your finished batch in a couple of 2-liter plastic bottles, cap tightly, and leave for a few days on the counter until the bottle is very firm if you squeeze it gently, then refrigerate.

If you don’t have a gallon jar or want less, use this principle: fill jar 1/3 full with fruit, add kickstarter if you can, fill within a couple of inches of top with cold water.  More ideas of fruit and veg choices here.

Quick and Easy Wild Blackberry Kvass

Makes a gallon.

  • 1 large organic apple, quartered
  • 6 cups wild blackberries or frozen
  • handful of raisins
  • 1/4 cup honey
  • 1/4 – 1/2 cup whey or leftover kvass to start fermentation

Add all ingredients to very clean gallon jar with lid.  Fill within a couple of inches to the top of the jar with cold water.  If you overfill, the bubbly fermentation action will make your jar overflow (take it from one who can’t seem to learn this lesson).  Screw on lid tightly. Check after 24 hours to make sure brew is bubbling; skim off any scum; and taste.  When it’s sour enough for you (for me, that’s about 3 days), refrigerate and let flavor develop for a few more days, then drink either straight or with more honey to sweeten.

cold soups made with a magic elixir called kvass

IMG_5306My new addiction is an old Russian fermented drink called kvass. It’s great as a breakfast juice or as an afternoon refreshment on a hot day: slightly sour, ice cold, a strong nose of beery grain or funky beet.  it’s a drink for those of us who like deep, dark, barnyardy flavors.  Or beer!

As discussed in my Russian zakuski party post, kvass is a healthful tonic full of enzymes and the lactobacilli that are the new popular kids on the block.  Whey can be added to rye bread or raw vegetables and fruits with nothing more than water, and the liquid will magically be soured to your taste.  Like lacto-fermented pickles, kvass sits on the counter until the good bacteria multiply and give it a characteristic tang.

I’m at work on my first blackberry kvass and a fermented version of tomato juice that I’m planning to push on an unsuspecting friend for bloody marys, and I will report back.  Until then, I wanted to share some easy cold soup recipes using kvass as the base, since I’ve already gone on about it and I can’t get enough.

IMG_5201Easy Beet Kvass

Chop up two big red beets; add to a half-gallon jar with two teaspoons of salt and a 1/4 cup of whey, sauerkraut juice, or a similar fermented liquid to hasten fermentation.  I used fermented dill pickle juice in the photo above, which is why you see a juniper berry floating on top.

Fill jar 3/4 to top with water and stir. Let sit on the counter for 2-4 days, depending on how sour you’d like the mix.  (I went for 4 days and the flavor was great for soup.)  Skim off any mold bits daily.  Strain and refrigerate.  Drink as is, or use uncooked as a liquid for cold soups, correcting for salt.

Beet Kvass Borscht

Serves 4.

There are various names for soups like this in Russian and Polish, but let’s just keep it simple.  You have two choices here: you can add your vegetables and let sit in the stock overnight for improved flavor but a thoroughly hot pink color; or you can add your vegetables just prior to serving for pretty colors (above).  It’s, as they say, all good.

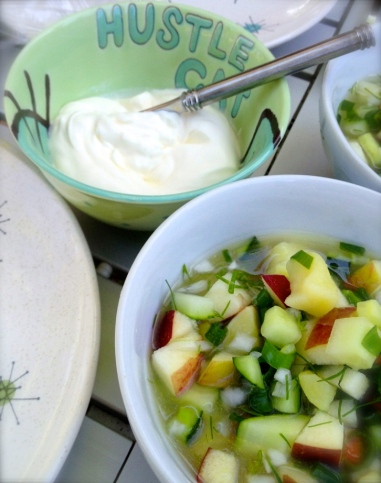
To a quart of cold kvass, chop up and add some or all of the following: cooked beets of various hues, cucumbers, scallions, chives, dill weed, apples, hardboiled eggs.  Serve immediately or let flavors develop in the refrigerator.  (But if you decide to add eggs, place on top just before serving.)  Taste and salt if necessary.  A gamechanging addition, should you have it on hand, is a good slug of dill pickle juice.  Or try kimchi juice?  Optional garnish: more herbs, a dollop of sour cream.

IMG_3596Rye Bread Kvass

This recipe is slightly more complicated and gooey than beet kvass, and yields a mildly alcoholic brew. You’ll need to get your hands on decent rye bread, either light or dark, with no preservatives.  Darker rye, such as the thinly sliced German or Russian stuff that’s bursting with grain and almost moist, is terrific but will yield a darker color for the kvass. In the picture, my kvass is a combination of about 1:3 dark:light rye. Alternatively, you can make your own rye or buckwheat mash, but I’ll leave it up to your powers of the internet to find a recipe for that.

I’m going to play with yeast types (I’ve heard ale and champagne yeasts make better kvass) and did not bother to secondary-ferment my kvass, as I wanted it for soup and fizzy soup sounds kind of gross to me, so let me know if you have any advice.

  • Half gallon jar or crock
  • 5-6 slices good quality bakery or German rye bread
  • packet of active dry yeast or piece of sour dough or 1/2 cup whey
  • fresh juice of one lemon
  • 1/4 cup honey
  • handful of raisins
  • 1/2 teaspoon salt
  • (For secondary fermentation, you will also need a 2-liter plastic bottle or similar)

Dry bread in the following manner: (1) let it sit on your counter until hard; or (2) toast in the oven until hard and golden brown.  If it burns a little, that’s ok, since it will add to the flavor.  Place in half-gallon jar.

Boil 7 cups of water and pour over bread in half-gallon jar.  Cover and let sit overnight.

Strain bread and press very gently to get as much liquid out as possible.  Discard bread and pour liquid back into jar.  Add yeast or sourdough or whey, lemon juice, honey, salt, and some raisins.  Cover and let sit on the counter for 2-4 days, checking for bubbles (good) and skimming off any moldy bits (bad) daily.  It should smell a little like beer once it gets going and look like the photo below.

IMG_3642For secondary fermentation, strain the kvass through cheesecloth and pour into a 2-liter bottle.  Add a few raisins to bottle.  Seal the cap and let sit for a few days.  Fermentation will build up inside the bottle.  When the raisins float to the top, it will be done.  Refrigerate and use as a drink sweetened with more honey, or as a delicious cold soup stock.

IMG_3664Okroshka (Cold Rye Vegetable Soup)

Serves 4.

Similar to the borscht recipe above, add chopped vegetables to a quart of cold rye kvass.  Since this is a clear soup, don’t add beets or the color will be ruined. Season with a bit of and a healthy dose of dill pickle juice, whole grain mustard, salt, and parsley.

There are as many versions of this soup as there are Russians.  Sandor Katz offers a version with potatoes and turnips in addition to the apples and cucumbers, but I’m not sure I like the texture of potatoes in cold broth because they are softer than the crisp apples and tend to taste merely waterlogged to me. I might try a version that is only cold cooked veg, though: yellow or chioggia beets, tiny waxed potatoes, tiny turnips, steamed Dutch round carrots. Several recipes call for the addition of chopped fermented dill pickles, a brilliant touch if you ask me.

In any case, the soup is even better with more dill and sour cream mixed in.

Oh, and one more.  I already posted my cold melon and cucumber soup made with kvass recipe here, but for sake of completeness…

Melon Cucumber Soup with Shiso

Serves 6.

  • 1 honeydew or other pretty green-fleshed melon
  • 3-4 medium pickling cucumbers or one firm, medium-sized cucumber
  • 1/2 cup kvass
  • 1/2 stale dinner roll or a slice of white bread
  • a pinch or two of salt
  • 1/4 cup any chopped green or banana pepper
  • 1-2 tablespoons tarragon
  • 5-6 green shiso (perilla) leaves, plus more for garnish, optional
  • crème fraîche for garnish, optional

Wash and peel melon, cut into chunks.  Peel and seed cucumber only if using one of those grocery store kinds with leathery skin and big seeds.  Tear bread into pieces and soak in kvass.  Add to food processor bowl or blender melon, chunks of cucumber, kvass/bread, salt, peppers, tarragon, and shiso.  Blend until as smooth as possible.  You might try pressing through a food mill or chinois after this step, if you and your guests are fancy.

Refrigerate for several hours, up to overnight but not more, to blend flavors.  Serve with a dollop of crème fraîche and a chiffonade of shiso in each bowl.

as american as roman honey pickled cherries with savory

IMG_3581Looking for a new locavore cherry recipe in anticipation of the sour cherry crop now ready to go in the Eugene area?  Go no farther than ancient Rome.

A fellow participant in the Cult of Pre-Pasteurian Preservation and Food Preparation Facebook group page, Justin Mansfield, wrote that one of his favorite Roman preservation recipes is this one, a pickled cherry concoction using honey, red wine vinegar, and savory. He provides some details for Classics geeks and historical recreators:

Since there’s some interest, here’s the original recipe, from the 10th century Roman agricultural collection Geoponica (Farm Work) 10.42: Περὶ διαμονῆς κερασίων· Τοῦ Αὐτοῦ. Κεράσια ἀφαιρεθέντα τοῦ δένδρου πρὸ ἀνατολῶν ἡλίου, καὶ εἰς σκεῦος ἐμβεβλημένα, προϋποβληθείσης εἰς τὸν πυθμένα θρύμβης, εἶτα κερασίων, καὶ πάλιν θρύμβης, καὶ ὀξυμέλιτος γλυκέος ἐπιβαλλομένου φυλάττεται· καὶ εἰς καλάμους δὲ ὡσαύτως φυλάττεται.On the preservation of cherries, by same {i.e. this recipe is excerpted from Florentius, a lost author of the Imperial era}. Cherries that are picked from the tree before sunrise and put into a container, with savory first strewn over the bottom, then cherries, then once again savory, and sweet oxymel added on top, will keep. They’ll also keep the same way with rushes.

The species referenced are probably Prunus cerasus, and Satureja thymbra respectively. (No idea what kind of rush is referred to here… the name refers to several species. Dalby also points out that it’s unclear if the meaning is “laid out on rush mats” or “with rush-leaves used in place of savory.”)

He also notes that other sources indicate the honey:vinegar ratio should be between 6-8:1 parts by volume, not weight.  I opted for less sweet, and may just regret it, since I chose a very full-flavor, acidic Italian cabernet vinegar.

The cherries should be sour pie cherries, not sweet ones (but I’m willing to look the other way if you can’t get sour).  The recipe reads as if the Romans didn’t pit the cherries, but you may opt to do so.  I usually buy my sour cherries at Hentze Farm in Junction City, already bagged and pitted because I’m so lazy.  Pros: no sticky pitting on a hot day; easier to eat final product; and you get a quart or so of the most glorious juice in the world.  Cons: not nearly as pretty as intact cherries; you’ll need to pick through the cherries for bruised ones, as the machine handles them roughly; and you don’t get the nice almond flavor from the pits when pickling them.  In either case, you must use sour cherries almost immediately or freeze them, as they are exceedingly fragile.

Romans didn’t cook with sugar; honey was a basic sweetener.  For locavores, you already likely rely heavily on honey and even might have a hive or two to help mitigate the bee crisis.  As for me, I made this recipe with a wild star thistle honey I bought on the road in California, since it seems vaguely Mediterranean and has the scent of almonds from nearby groves (or so I fantasize).  But if you’re in the market, there’s some local thistle honey that’s being sold at Sundance, distributed with other wonderful varieties like pennyroyal, snowberry, meadowfoam, buckwheat, and coriander. (The coriander is grown in fields north of Eugene, Hummingbird Wholesale tells me, and the pennyroyal tastes a little like mint.)  Also in honey news, I hope you caught the interview with new Eugenius and prolific cookbook author Marie Simmons on Food for Thought on KLCC last weekend.  She has just published a book on honey, with history and recipes.  Marie was our last interview before our summer hiatus, so check out the archive if you missed it and you miss us! :-)

Anyway, the Roman pickled cherry recipe is wonderful with homemade duck rillettes, which I had for breakfast in a moment of sheer decadence.  Life’s too short for Cheerios.  As Epicurus would have said, had he known the phrase, carpe diem!  The savory brings out a, well, savory quality of the cherries.

Honey Pickled Cherries with Savory

Makes one quart.

  • 4 cups sour cherries, either pitted or not
  • 1 cup honey
  • 1/8 cup wine vinegar
  • 12 two-inch sprigs of savory (either winter or summer; I used winter, which is stronger)

Wash and sterilize a quart jar.  If you are using fresh sour cherries, rinse and sort out the bad ones.  If you are using pitted cherries, strain cherries and sort for badly bruised ones.  Reserve the juice unless you are completely nuts.  Pour yourself a shot of pure sour cherry nectar and knock it back.  Ah, there.  OK, now proceed.

Heat the honey and wine vinegar in a medium saucepan, then take off heat and let the cherries soak in the mixture for a few minutes.

Rinse savory.  Place 3-4 sprigs at the bottom of the jar, then add another layer in the middle, then add some on top to help keep the cherries immersed in the liquid.

Using a jar funnel, carefully ladle the cherries into your jar, pressing down gently to fill gaps, and adding savory in the middle and on top.  Fill with 2 inches head space.  You may have more cherries than necessary; if so, enjoy over ice cream with more honey.  If there is not enough liquid, either add back the juice you removed or press down a little harder on whole cherries to encourage them to exude juice.

Place on a plate, and cover jar with cheesecloth.  If you used unpitted cherries, it is especially important that you have enough overflow capacity. Let sit on counter for 48 hours minimum.  At this point, taste and decide if you want to ferment longer for a fizzier, deeper, sweet-sour flavor, or otherwise refrigerate.  Pitted cherries will ferment faster.

Enjoy as a condiment with any roast meat or sausage, as a special side on a cheese plate, or, as I just did, with duck rillettes.

fermented mustard greens

IMG_3278

To prepare for my fermentation class on Saturday, I’ve been experimenting with fermented vegetables in small batches.  We’re making sauerkraut and red and white kimchi, and tasting a range of wonderful ferments, including fermented mustard greens.

Although “Sichuan pickled vegetable” and “preserved mustard greens” (among other names) are widely available in Asian markets, I wanted to make my own using my garden-grown fresh mustard greens.  My greens lack the fleshy stem of the Chinese mustard green called jie cai (芥菜) in Mandarin or gai choy in Cantonese, but they are still tasty and very flexible.  They have a nice slight bitterness and spicy flavor, a great foil for bland noodles, white fish, pork belly or other fatty pork, and soups.

I’ve also used this recipe for fermented green beans for the wonderful Sichuan dish chopped sour beans with pork.  I don’t care for the ginger and other spices when used with green or long beans, so I just use salt and a little sugar.  I successfully froze slightly sour beans in their brine last summer and used them in stirfry dishes this winter.  Much better than the weird spongy flavor of frozen chopped green beans.

Note: I adapted this recipe very loosely from Fuchsia Dunlop’s pickled vegetable recipe, which appears in various forms in her Sichuan and Hunan cookbooks. Dunlop calls for rice wine or vodka in her original recipe.  As this would inhibit the fermentation process, I’ve removed it.

Sichuan Fermented Mustard Greens

  • 2 large bunches mustard greens
  • 1/4 cup coarse sea salt
  • 1 tablespoon brown sugar
  • 3-inch piece of peeled fresh ginger
  • 3-4 dried chiles (Facing Heaven variety, if you have them)
  • 1/2 star anise
  • 1/3 cinnamon stick
  • a tablespoon or two of live-culture sauerkraut (not processed) or fermented hot pepper juice or whey (optional, to speed fermentation)
  • a half-gallon or larger jar, two ziplock-style bags, and a piece of cheesecloth large enough to cover jar

Bring two cups of water, salt, and sugar to a boil; let salt dissolve and set aside to cool a bit.

Slice mustard greens into three or four big chunks.  Do not chop too finely or they will be harder to handle.

In a sterilized half-gallon sized (or larger) jar, add the chiles, star anise, cinnamon stick, and optional fermentation “starter” of sauerkraut or pepper juice or whey.  (Make sure this juice is from live-culture products with lacto-bacilli to inoculate the mixture or else it won’t work.) Then pack mustard greens into the jar, pressing down tightly.

Pour one cup of brine over the mustard greens, and the rest into a ziplock-style bag.  Place one bag into another bag and close both securely to ensure the brine won’t leak.  Use the bag as a weight in the jar to submerge the greens under the water.  If there isn’t enough brine to cover the greens, pour some of the brine in the bag into the jar.  You can use other methods (like a bowl or jar filled with water or river rock) as a weight, as well.

Cover jar with cheesecloth and let sit at room temperature for 3-7 days, testing daily after three days for your desired levels of sourness.  Skim any white film off the top of the water and remove green bits that have molded on top.

For storage, cover the jar with an airtight lid and refrigerate.  The quality will improve after another week or so in refrigeration, but will start to deteriorate after a month.

Before serving, chop into small pieces.  Great in soups, pork stir-fries, dumplings, fried rice, noodles, etc.

on the calendar for today: fun with fermentation

Excited about the Fun with Fermentation festival today, 11-4 pm at the WOW Hall!  I’ll be presenting on fermentation basics at 1:45.  Check out all the details, including the great line-up of speakers and vendors here.

Since Farmer John Karlik will be teaching sauerkraut earlier in the day, I’ll focus on other vegetable ferments, including mixed vegetables like kim chi and chow chow, and fermented sauces like hot pepper sauce and salsa.  All my recipes are included in my pickling index.  I don’t have a recipe for fermented salsa (I wasn’t happy with the ones on the internet and amended them, but only have notes right now) but will before tomato season comes ’round again!  For reference, consider this recipe from a fellow PNW blogger and trusted source, Northwest Edible.

See you soon!

DIY skill training in eugene and beyond

IMG_7744

Resolved to improve your DIY skills this year?  Winter is the time!  Take advantage of rainy days in Eugene to attend one of many classes and workshops on gardening, keeping various helpful critters, or food preservation.

The Fun with Fermentation festival at the WOW Hall on January 12, 11:00-4:00, is now in its fourth year.  I’ll be holding a workshop on fermentation basics — making kim chi and sampling salsa and other goodies.  And that’s just the beginning! There will be plenty of fun, learnin’, and fermented food tasting for all.

The OSU Oregon Master Beekeepers program starts in Eugene on January 16, 2013. See their website for details about the apprentice program and class schedules.

The Lane County Extension Master Gardeners are beginning their annual certification training.  It starts Wednesday, Jan. 9, 2013, at the Unitarian Universalist Church, 1685 W 13th (at Chambers) in Eugene. Here’s a taste of the schedule:

  • 8:30-11:30 a.m. is Tree ID with Steve Bowers;
  • 12:45-3:45 p.m. is Tree Fruits with Ross Penhallegon [in his last few months before retirement — congratulations, Ross!];
  • 3:45-4:15 p.m. is an informational meeting about the Pruning Specialist Program.

All MGs are welcome to sit in on classes, of course, but the public is welcome, too – $25 per class.

Another event:  Tuesday, January 15, 2013, 7 p.m. for the Master Gardener Seminar: Backyard Homesteading with Bill Bezuk. Note new location: EWEB North Building, 500 E 4th Avenue, Eugene. Free, bring a friend.

Lane/Douglas Counties Extension Master Food Preserver full certification class series will begin in April.  We’re taking applications now until March.  And don’t forget that Master Food Preserver winter workshops in Eugene are in full swing:

MFP Winter Saturday Special Classes:

Registration is now open for three 2013 Winter Saturday Specials workshops. Take one, two or all three of the classes. Cost per class is $25 if taken individually or take all three for $60. Print off the registration form and mail check made out to OSU Extension Service to 783 Grant Street, Eugene, OR 97402. Workshops are held at the Community of Christ Church, 1485 Gilham Road, Eugene from 10 a.m. -2 p.m.

  • January 12, 2013 – Soups & Stews: Learn to make Lamb Basque, Moroccan Chicken, and Irsh beef stews. Soups made will be Cambodian Sweet and Sour, Cuban Moros & Christianos, and Mexican Gazpacho. All served on rice. Credit card payment $25.
  • February 9, 2013 – Get a great introduction to the many varieties of beans and how to cook them even for dessert. Credit card payment $25.
  • March 9, 2013 – Discover many new whole grains and grain-like foods. Learn basic cooking techniques and ways to use grains in your meal-planning for health, economy and taste. Credit card payment $25.

MFP Spring Saturday Special Classes:

Registration is also open for three 2013 Spring Saturday Specials workshops. Take one, two or all three of the classes: Cheese Making, Fermentation, and Intro to Canning.

  • April 6, 2013 – Cheese Making: Learn the basics in this hands-on class. Make soft cheeses to taste and take home. Credit card payment $50.
  • May 18, 2013 – Fermentation: Learn tips on fermenting dairy, bread, pickles and other fermented delights. Hands-on class. Limited to 12 students. Credit card payment $50.
  • June 8, 2013 – Intro to Canning: Learn about equipment, tips for success, and what is safe to do at home and what is not. Credit card payment $20.

consider the vegetable: produce as modern art

Squash growing five feet up an elm tree; Eugene, OR
Sweet trompe l’oeil pastries shaped like bok choi mimicking jade sculpture in National Museum, Silks Palace Restaurant, Taipei

Of all the odd patterns I’ve discovered through my study of food in modern literature,  fruit and vegetables as victims of circumstance is probably the one I like best.  Meat, since Upton Sinclair’s The Jungle (1905), had its battleground drawn between the forces of good and evil.   But produce, it would seem, was contested land.

Red cabbage sauerkraut lacto-fermenting; Eugene, OR
Seed zucchini in the winter rain; Open Oak Farm, Sweet Home, OR

Breaking free from the cornucopia and vanitas imagery that played out in paintings over and over again from the Dutch Old Masters onward, the vegetable in particular was portrayed in new and unusual and almost unrecognizable ways, frequently being destroyed by man’s (or woman’s!) hand: decaying, tortured, forced to adapt and survive in unfriendly conditions.

Display at Food Network’s Food and Wine Festival Grand Tasting, 2011; New York, NY
Native but tropical-flavored pawpaw, first crop in seven years; The Gourd Patch, Springfield, OR
Indian drumstick vegetable (Moringa oleifera), steamed; Oakland, CA

Be a modernist.  Try it yourself. It’s winter and raining and your imagination has nothing better to do to combat the Christmas onslaught of kitschy, rehashed icons and themes. Promote, as M. F. K. Fisher did, a tonic of mixed leftover vegetable juices as a tasty treat.  She fooled no one.  Would you have better luck with an apple-paw paw-drumstick cocktail?

Or think of vegetables not as their perfectly ripe, brilliantly colored, archetypal forms, but rather in a state of decay, too big and fecund, too shrunken, cut into pieces, out of place, misshapen, a seed, growing awry, doomed…

First harvest of Belgian endive, next it goes into deep chill then darkness to grow the familiar pale yellow chicon; Sunset Lane Farm, Brownsville, OR

…or is it dormant, exceptional, whole in its fragmentation, full of promise?